Finally my E-Wallpaper have done. Of course, I have did lots of work and do it with all my heart. Now, I'm going to show you the process that I had done on my E-Wallpaper. =]
First, set paper size to A4. Make sure your resolution is 72, color mode is RGB color and 8 bit.
Open the image that you want from your computer and drag it by pressing SHIFT.
The original image that you see is the moon was at the right hand side but i would like to change the position. So, go to EDIT > TRANSFORM > FLIP HORIZONTAL.
You will get this.
Then, i would like to place some mooncake into the picture. Make sure that you learn well in few steps because we will repeat the same for few times. First, go to FILE > OPEN and choose the image. As usual, copy the background and hide the first background. Use BRUSH and QUICK MASK to paint the part that you want to cut out.
After you select the part you want then press "Q", it will become like the picture below.
Press BACKSPACE and you will now get this.
Go to SELECT and choose DESELECT. Drag this picture to wallpaper which you want and place it into a new layer.
Use ERASER TOOL to erase the extra part.
Finish erasing, press CTRL+T to adjust the size of the picture that you want.
Because of the layer of the mooncake is too many, so I keep them in a folder and named it as ''mooncake layer'' so that it won't confuse me.
Next, I'm going to add in my little baby. I just repeat the steps that I mention just now.
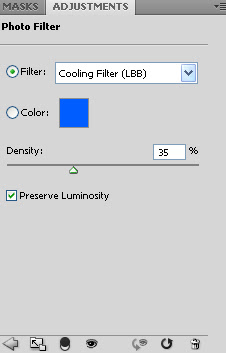
Add DROP SHADOW and ADJUSTMENT as shown above.
The picture looks more attractive.
Lantern will be added in. Repeat the steps. Open a folder too.
The colors of lantern I not really like it, so i replaced it with other colors. Go to ADJUSTMENT > REPLACE COLORS.
I also added same OUTER GLOW on each of every lantern.
I get to find some interesting chinese font from other picture so i decided to just cut it rather then write it myself which is not so nice.
Lastly, I used VERTICAL TYPE TOOL on my background image and put some effect on the text.


